Multiple Scene Support in TCA.
When developing an app with SwiftUI, it offers seamless adoption for various platforms such as iPadOS, macOS, watchOS, and visionOS, leveraging SwiftUI's inherent adaptability to render components appropriately across these platforms.
In this article, we delve into the additional features brought about by adopting for iPadOS, particularly focusing on enabling multiple windows, referred to as scenes in the development context.
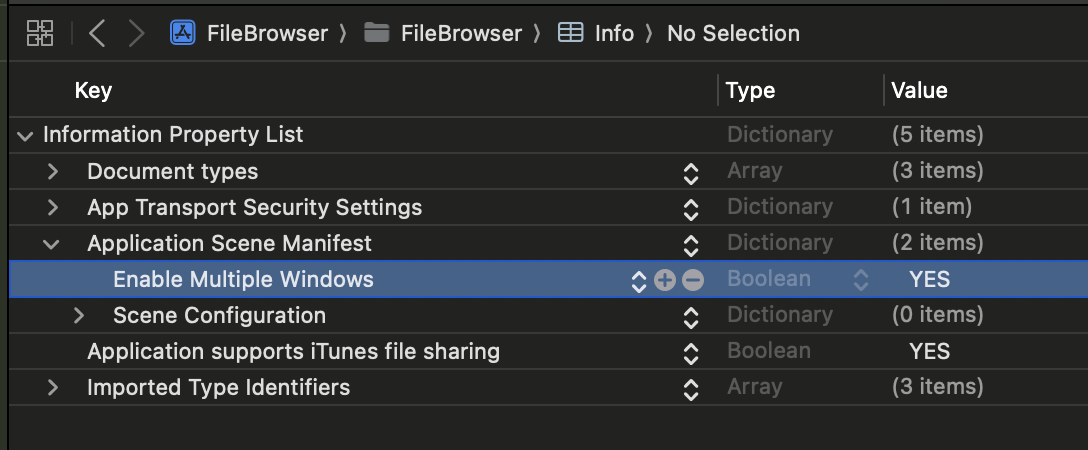
Enabling multiple scenes requires adding a key into the Info.plist of the app. Here's what it looks like:
<dict>
    <key>UIApplicationSupportsMultipleScenes</key>
    <true/>
    <key>UISceneConfigurations</key>
    <dict/>
</dict>
Or, represented visually:
The Problem
As depicted in the above video, both scenes are utilizing the same store, which is not desirable behavior for this app. Given its nature as a file browser app, it should have separate state for different paths.
Current App Setup
import AppFeature
import ComposableArchitecture
import SwiftUI

@main
struct FileBrowserApp: App {

    var body: some Scene {
        WindowGroup {
            AppView(store: .init(initialState: AppFeature.State() {
                AppFeature()
            })
        }
    }

}
At first glance, it may seem appropriate to create a store at the App level for reuse across all windows/scenes.
@main
struct FileBrowserApp: App {

    let store: StoreOf<AppFeature> = .init(initialState: AppFeature.State()) {
        AppFeature()
    }

    var body: some Scene {
        WindowGroup {
            AppView(store: store)
        }
    }

}
However, as of SwiftUI in iOS 17, this approach does not create a new WindowGroup but rather utilizes the same, resulting in the shared store issue. To address this, we can programmatically opt-in using the UISceneDelegate class.
The Solution
To implement a SceneDelegate, we can utilize two methods: one by installing AppDelegate and the other by using Info.plist. Here, we adopt the former approach.
class FileBrowserAppDelegate: NSObject, UIApplicationDelegate {

    func application(
        _ application: UIApplication, configurationForConnecting connectingSceneSession: UISceneSession, options: UIScene.ConnectionOptions
    ) -> UISceneConfiguration {
        let sceneConfig = UISceneConfiguration(name: nil, sessionRole: connectingSceneSession.role)

        // Defining a delegate Class when there is a new session to about to connect.
        sceneConfig.delegateClass = FileBrowserSceneDelegate.self
        return sceneConfig
    }

}
In the above code, we assign a scene delegate using sceneConfig.delegateClass = FileBrowserSceneDelegate.self. The FileBrowserSceneDelegate class appears as follows:
class FileBrowserSceneDelegate: NSObject, UIWindowSceneDelegate, ObservableObject {

    var store: StoreOf<AppFeature> = {
        .init(initialState: AppFeature.State()) {
            AppFeature()
        }
    }()

}
Here, we create a store for the app in the SceneDelegate, as a new SceneDelegate instance is created for every scene session. Notably, FileBrowserSceneDelegate conforms to the ObservableObject protocol, allowing SwiftUI to automatically install the SceneDelegate instance to EnvironmentObject. Consequently, we can access the store from the sceneDelegate via EnvironmentObject, as illustrated below:
struct AppContainer: View {

    @EnvironmentObject var sceneDelegate: FileBrowserSceneDelegate

    var body: some View {
        AppView(store: sceneDelegate.store)
            .onOpenURL { url in
                sceneDelegate.store.send(.openURL(url))
            }
    }

}
To access the EnvironmentObject, we encapsulate it within a separate view such as AppContainer. We can then update FileBrowserApp (entry point) as follows:
struct FileBrowserApp: App {

    @UIApplicationDelegateAdaptor(FileBrowserAppDelegate.self) var appDelegate

    var body: some Scene {
        WindowGroup {
            AppContainer()
        }
    }
}
To integrate an AppDelegate into a SwiftUI App, we utilize the @UIApplicationDelegateAdaptor property wrapper.
Opening Window via User Input
Occasionally, there arises a need to open a new window specifically for a directory, a functionality reserved for iPadOS/macOS environments only.
SwiftUI offers environment property wrappers tailored for such adaptations:
@Environment(\.supportsMultipleWindows) var supportsMultipleWindows
@Environment(\.openWindow) var openWindow

var body: some View {
    ForEach(store.items) { item in
        DirectoryItemView(item, store: store)
            .contextMenu {
                if supportsMultipleWindows {
                    Button("Open in Window") {
                        openWindow(value: item.path)
                    }
                }
            }
    }
}
However, these property wrappers retrieve their values solely within a View, thereby introducing a dependency that diminishes the testability of our feature. To mitigate this, we can employ a Dependency client for UIApplication-related operations.
UIApplication Dependency
@DependencyClient
public struct UIApplicationClient {
    public var supportsMultipleWindows: () -> Bool = { false }
    public var openWindow: (_ path: String) async -> Void
}

extension UIApplicationClient: DependencyKey {
    public static var liveValue: UIApplicationClient = {
        return .init {
            UIApplication.shared.supportsMultipleScenes
        } openWindow: { path in
            let activity = NSUserActivity(activityType: "path")
            activity.userInfo = ["path": path]
            await UIApplication.shared.activateSceneSession(
                for: UISceneSessionActivationRequest(
                    role: .windowApplication,
                    userActivity: activity
                )
            )
        }
    }()
}
supportsMultipleWindowswill return true if the app runs oniPadOSand if the Info.plist contains theUIApplicationSupportsMultipleSceneskey set to true.
- The
openWindowmethod opens a new window by activating a Scene Session and passing the path viaNSUserActivity.
We can integrate this dependency into the DirectoryFeature as follows:
@Reducer
public struct DirectoryFeature {
    @ObservableState
    public struct State: Equatable {
        var supportsMultipleWindows: Bool

        init() {
            @Dependency(\.uiApplicationClient) var uiApp
            self.supportsMultipleWindows = uiApp.supportsMultipleWindows()
        }
    }

    public enum Action: Equatable {
        case contextMenu(MenuAction, item: ItemPath)

        public enum MenuAction: Equatable {
            case openInWindow
            ...
        }
    }

    @Dependency(\.uiApplicationClient) private var uiApp

    public init() {}

    public var body: some ReducerOf<Self> {
        Reduce<State, Action> { state, action in
            switch action {
                case .contextMenu(let action, let item):
                    switch action {
                    case .openInWindow:
                        return .run { send in
                            await uiApp.openWindow(path: item.path)
                        }
                        ...
                    }
            }
        }
    }
}
To retrieve the NSUserActivity for the new scene, we incorporate the following code into our SceneDelegate:
class FileBrowserSceneDelegate: NSObject, UIWindowSceneDelegate, ObservableObject {
    var store: StoreOf<AppFeature> = {
        .init(initialState: AppFeature.State()) {
            AppFeature()
        }
    }()


    func scene(_ scene: UIScene, willConnectTo session: UISceneSession, options connectionOptions: UIScene.ConnectionOptions) {
        if let userActivity = connectionOptions.userActivities.first,
            let path = userActivity.userInfo?["path"] as? String
        {
            store.send(.updatePath(path))
        }
    }
}
Consequently, creating a fresh store and updating its path upon receiving a new path in the user activity from the connection options will allow us to utilize the multiple windows feature of iPadOS accurately.
We trust you find this article insightful and informative. Thank you for reading.